 Ba-bam.
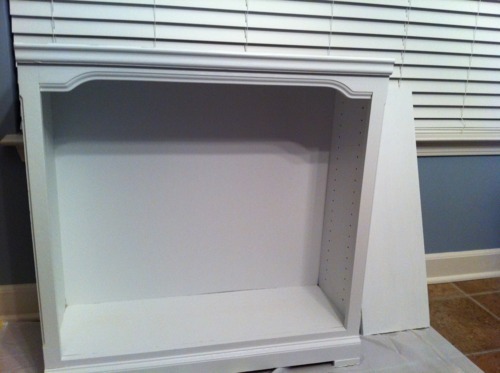
One step closer to finishing the project-that-never-ends. But to be fair, it’s not really the project’s fault. It’s totally mine. But weekend time is precious, okay? And between sleeping til 10 and clipping coupons, I can only squeeze in so much.
Anyway. I’ve been following a tutorial I found online, and to my surprise it actually turned out pretty well! It said if you do it right (several thin coats instead of 1-2 thick coats), you should still be able to see the wood grain pattern underneath. And you totally can. So, score 1 for Laura’s First DIY Project.
Now there’s only 1 more step: the glaze. This will probably be the true test of my newfound DIY-skillz (that’s a thing, right?), as it could easily end up looking like I just spilled brown paint all over a perfectly good white bookshelf, and all will be for naught.
Things I learned in this stage of DIY:
>Do not use newspaper in an attempt to be proactive and protect the concrete from drippage (I really did think I was making the right decision here). Fun fact: Newspaper does, in fact, stick to paint, and you will have to rip it off the bottom of the bookshelf after it dries due to the fact that you painted the bottom edges with abandon, thanks to the aforementioned “protection” from drippage. Pieces will be left behind, and goops of undried paint will get on your hands after you have just gotten all of it off from the initial painting. Perhaps trash bags would be less cumbersome? I don’t pretend to have all the answers. Just sweet skillz.
That’s really about it. Short list, but all I did was go outside and paint. And nothing went terribly wrong. So I’m okay with it.
Tune in next time [read: any time between now and November] for the exciting conclusion of: Laura’s First DIY Project. [Feel free to insert your own epic theme song here. I chose Eye of the Tiger. Did I say “epic?” I meant “inspiring and totally awesome.”]